

On this page
Ansible is a fantastic tool if you're a DevOps enthusiast or a beginner in infrastructure automation. This article will guide you in setting up an Ansible home lab using Vagrant, a tool that simplifies your work. By the end of this guide, you'll be proficient in spinning up virtual machines to practice and learn Ansible.
Prerequisites
Before we get our hands dirty, let's ensure we have all the necessary tools in our arsenal. You'll need:
- Windows Machine - Let's be real; most of us work on Windows machines, so that's what we'll be using as our base operating system for running our virtual machines. If you're on a different OS, no worries! The process is pretty similar.
- Virtual Box - This is the virtualization software we'll be using to create our virtual machines. You can grab the latest version from the official website. It's free, so no need to break the bank!
- Vagrant - Vagrant is our secret weapon for managing virtual machine environments. It abstracts away the complexities of creating and configuring VMs, making our lives much easier. You can download it from the Vagrant website.
- Code Editor - You'll need a code editor to write your Ansible playbooks and vagrant files. I prefer Visual Studio Code but feel free to use whatever you're comfortable with. As long as it supports YAML syntax highlighting, you're good to go.
Provisioning the Lab
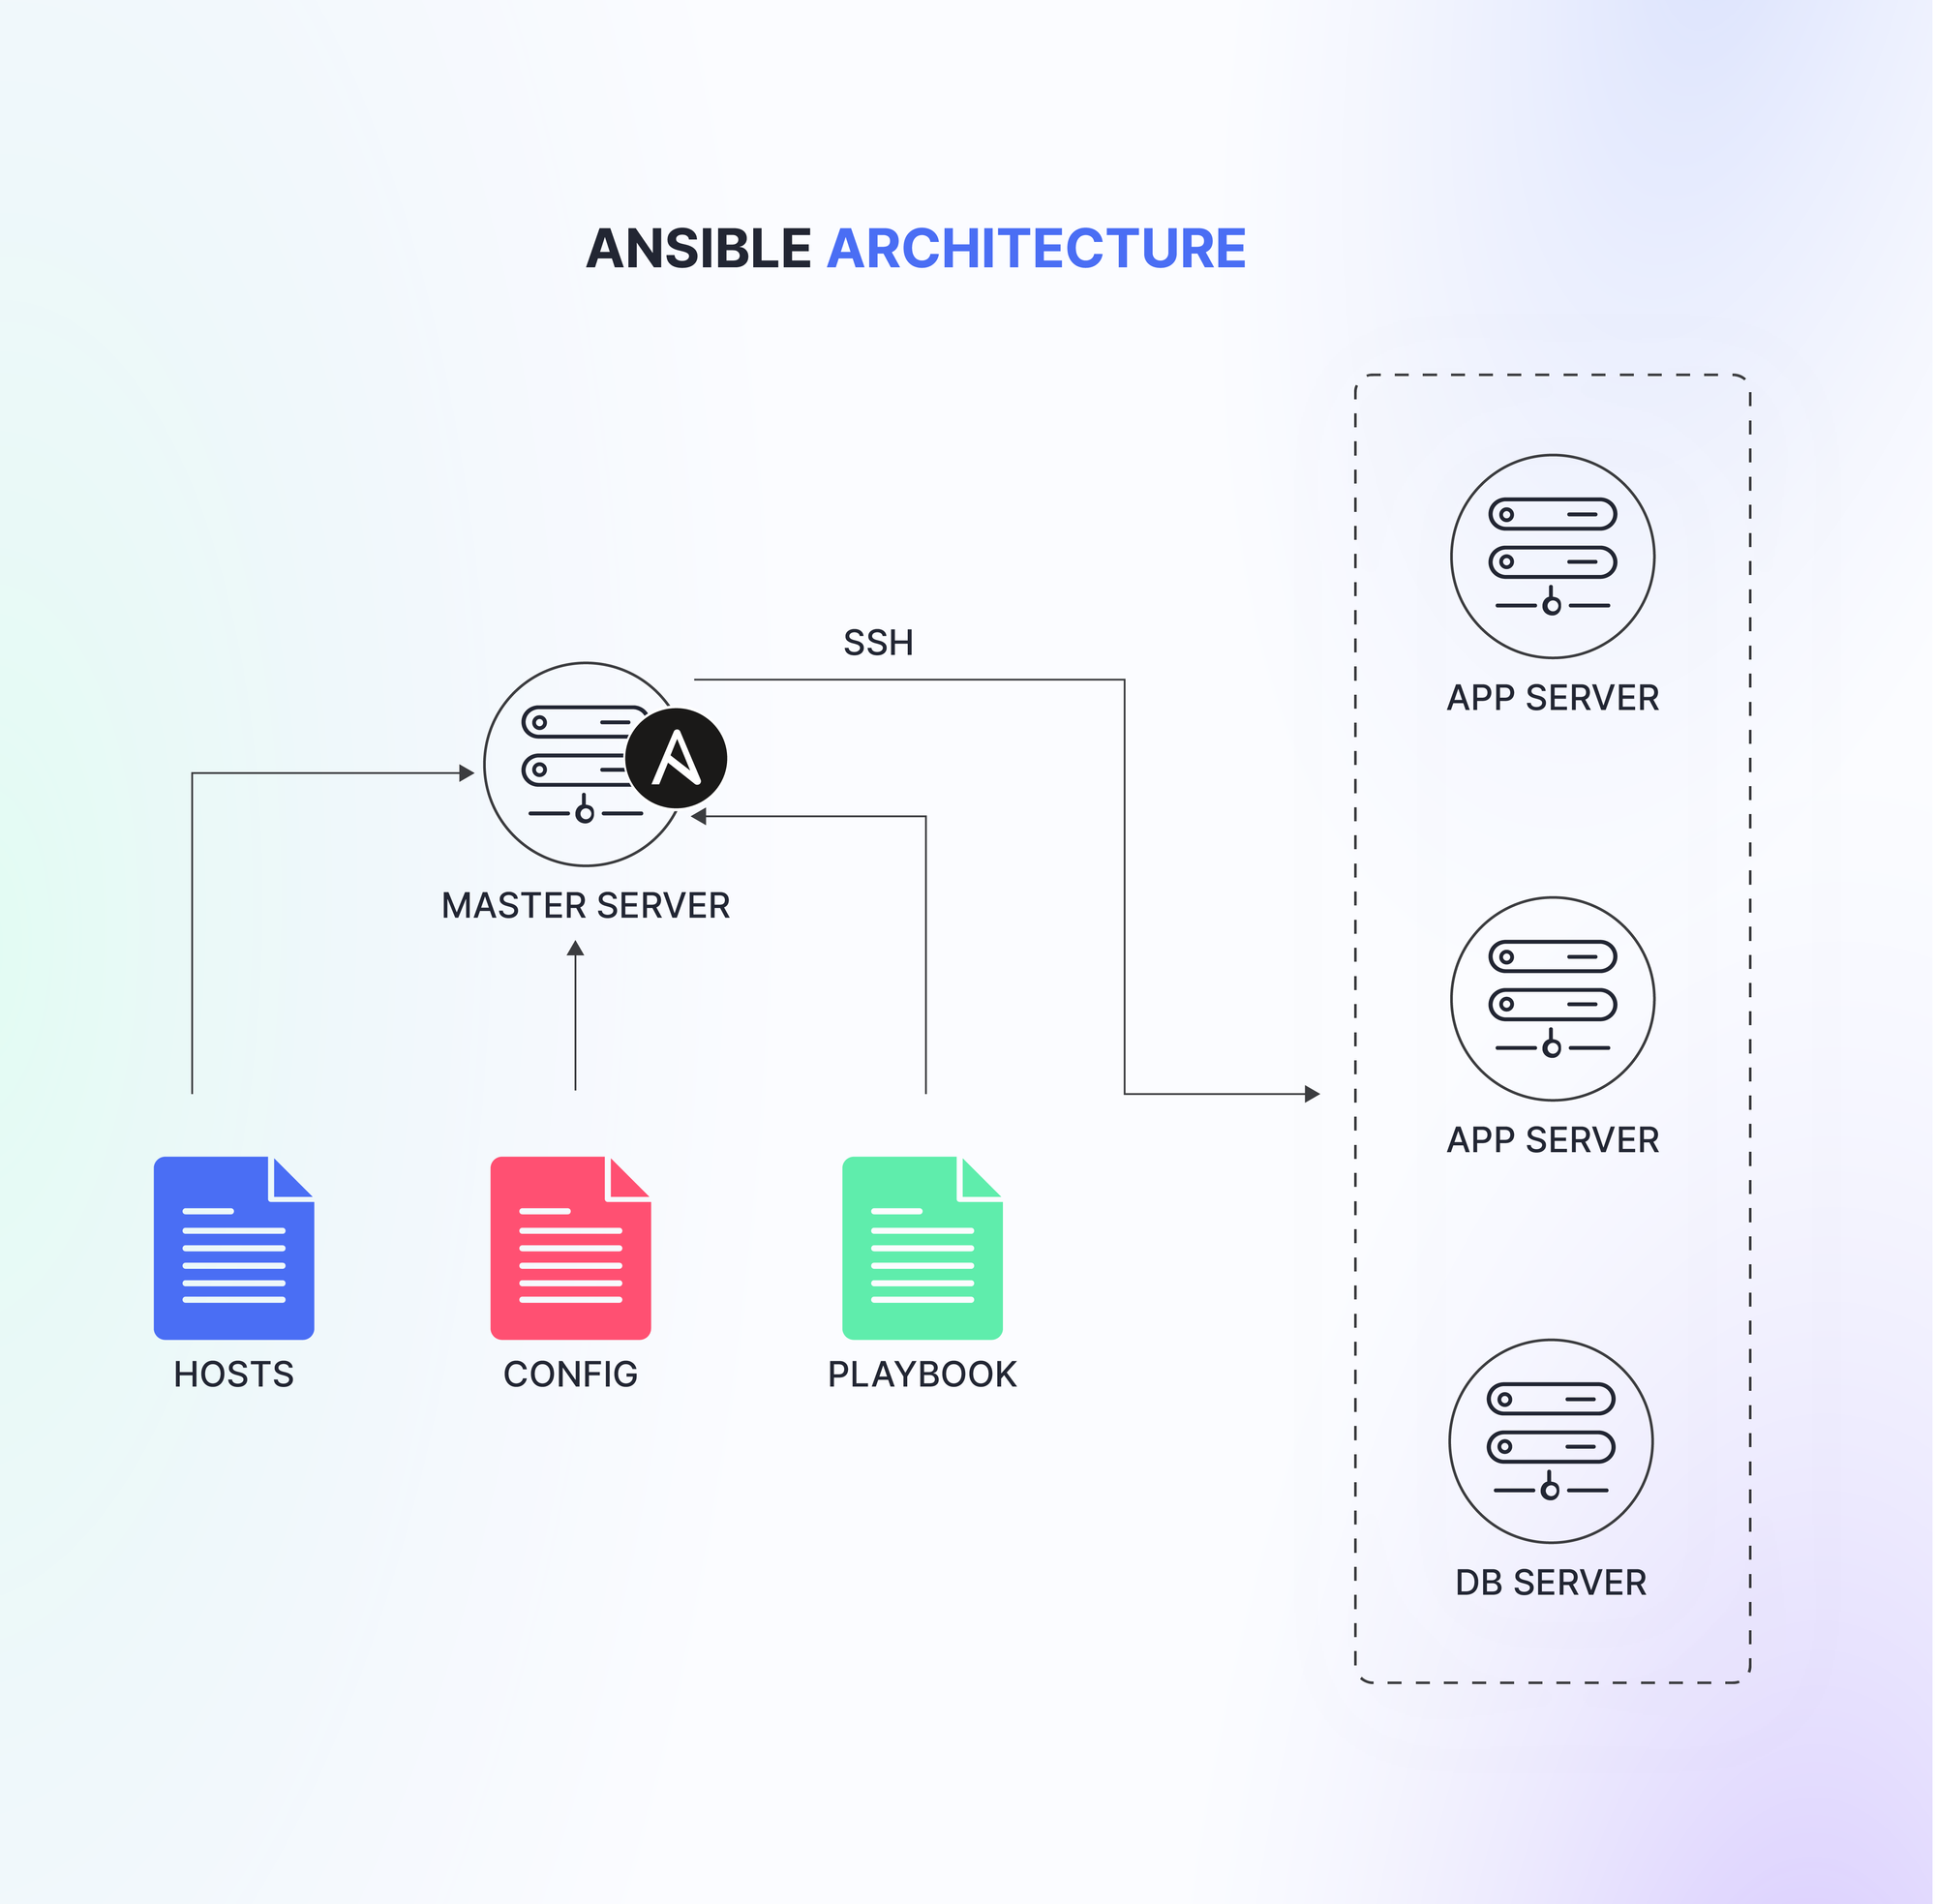
With all the prerequisites in place, let's now provision our practice lab using Vagrant. Here is what our lab would look like:
I have already created the necessary Vagrant files and scripts to spin up this lab. You can clone them from my GitHub repository by running the following command:
$ git clone https://github.com/thatstraw/learn-ansibleThe repository contains a Vagrantfile, which looks like this:
# -*- mode: ruby -*-
# vi: set ft=ruby :

Vagrant.configure("2") do |config|

  #config.ssh.insert_key = false

  config.vm.synced_folder ".", "/vagrant", disabled: true
  config.vm.boot_timeout = 900

  # master server.
  config.vm.define "master-server" do |master|
    master.vm.box = "geerlingguy/rockylinux8"
    master.vm.hostname = "master-server"
    master.vm.network :private_network, ip: "192.168.56.4"
    master.vm.provider "virtualbox" do |v|
      v.memory = 2048 # 2GB RAM
    end
  end

  # Application server 1.
  config.vm.define "app01" do |app|
    app.vm.box = "ubuntu/jammy64"
    app.vm.hostname = "app-server-01"
    app.vm.network :private_network, ip: "192.168.56.5"
    app.vm.provider "virtualbox" do |v|
      v.memory = 512 # 1GB RAM
    end
    app.vm.provision "shell", path: "enable_ssh_password_auth.sh"
  end

  # Application server 2.
  config.vm.define "app02" do |app|
    app.vm.box = "ubuntu/jammy64"
    app.vm.hostname = "app-server-02"
    app.vm.network :private_network, ip: "192.168.56.6"
    app.vm.provider "virtualbox" do |v|
      v.memory = 512 # 1GB RAM
    end
    app.vm.provision "shell", path: "enable_ssh_password_auth.sh"
  end

  # Database server 1.
  config.vm.define "db" do |db|
    db.vm.box = "geerlingguy/rockylinux8"
    db.vm.hostname = "db-server-01"
    db.vm.network :private_network, ip: "192.168.56.7"
    db.vm.provider "virtualbox" do |v|
      v.memory = 512 # 1GB RAM
    end
  end

end
This Vagrantfile sets up a lab environment with four virtual machines (VMs): a master node, two application nodes, and a database node. Here are the key points:
- Base Images: The master and database nodes use the "geerlingguy/rockylinux8" box, while the application nodes use "ubuntu/jammy64".
- Synced Folder: The default synced folder is disabled as it's not needed for this setup.
- Node Configuration:
- Each node is assigned a hostname and a private IP address for easy identification and connectivity.
- The master node has 2GB RAM allocated, while the other nodes have 512MB RAM each. Adjust these values based on your system's capabilities.
- For the application nodes, an "enable_ssh_password_auth.sh" script is run to enable SSH password authentication.
- Node Roles:
- The
masternode acts as the Ansible control machine for writing and executing playbooks. - The
app01andapp02nodes are the application servers, simulating a typical web server setup. - The
dbnode is the database server, providing a reliable data store for the application.
- The
To spin up the lab environment, run vagrant up in the terminal from the directory containing the Vagrantfile. Vagrant will provision all the VMs based on the defined configuration.
Installing Ansible in the Master Node
Alright, now that we've got our lab environment up and running, it's time to install Ansible on the master node.
Installing Ansible in the Master Node
We have a couple of options for installing Ansible on the master node. Let's go over both methods:
Method 1: Installing Ansible from the EPEL Repository First, SSH into the master node:
$ vagrant ssh masterThis will log you into the master VM we defined earlier. Once you're in, you need to enable the EPEL repository:
$ sudo dnf install https://dl.fedoraproject.org/pub/epel/epel-release-latest-8.noarch.rpm -yNext, update the package index:
$ sudo dnf updateThis will ensure we have the latest package information. Finally, let's install Ansible! Run the following command:
$ sudo dnf install ansible -yThis will fetch and install the latest version of Ansible from the EPEL repository. Once the installation is complete, you can verify the version by running:
$ ansible --versionYou should see an Ansible version printed out, confirming that Ansible is installed.
Method 2: Installing Ansible via PIP Ansible can also be installed using Python's package installer (PIP), which is the simplest and easiest way of installing Ansible:
$ sudo dnf update
$ sudo dnf install python3-pip -y
$ pip3 install ansible
Both methods will get you the same result: a fully functional Ansible installation on Rocky Linux 8. The choice is yours – use whichever method you're more comfortable with.
Set Up SSH Key-Based Authentication for Ansible
Now that we've got Ansible up and running on our master node, it's time to make our lives even easier by setting up SSH key-based authentication for Ansible. This will allow us to connect to our managed nodes (the app and db servers) without having to enter passwords every single time.
Inside the master, generate a new SSH key pair by running the following command:
$ ssh-keygenYou can simply hit Enter to accept the default settings when prompted.
Next, we need to copy this public key to the authorized_keys file on each of the managed nodes (app01, app02, and db). You can do this using the ssh-copy-id command:
$ ssh-copy-id vagrant@192.168.56.5
$ ssh-copy-id vagrant@192.168.56.6
$ ssh-copy-id vagrant@192.168.56.7
If prompted for the password, the default password is vagrant.
Create ansible config file
In Ansible, the configuration file (ansible.cfg) is used to control various settings and behaviors related to how Ansible runs. This file can be placed in multiple locations, and Ansible will read it in a specific order of precedence. The most common location for the configuration file is the /etc/ansible/ansible.cfg directory, but it's often better to keep it separate from the Ansible installation, especially when working on different projects or environments.
In our case, we need to create an Ansible configuration file to specify some default settings, such as disabling host key checking and specifying the SSH private key that ansible will use when connecting to managed nodes. We'll also configure Ansible to run tasks with elevated privileges (sudo) by default.
On the master node, create a new directory to store our Ansible files:
$ mkdir ~/ansible-lab
$ cd ~/ansible-lab
Create a new file called ansible.cfg in the ~/ansible-lab directory:
$ nano ansible.cfgIn this file, add the following lines:
[defaults]
host_key_checking = False
private_key_file = ~/.ssh/id_rsa

[privilege_escalation]
become=True
Let's break down these settings:
[defaults]is a section header that specifies default settings for Ansible.host_key_checking = Falsedisables host key checking, which is a security measure used to verify the authenticity of the remote hosts you're connecting to. We're disabling it for simplicity, but in a production environment, you should consider keeping it enabled for better security.private_key_file = ~/.ssh/id_rsatells Ansible to use the private key located at~/.ssh/id_rsafor SSH connections. This is the private key that we generated earlier for SSH key-based authentication.[privilege_escalation]is a section header that specifies settings related to privilege escalation (running tasks with elevated privileges, such as sudo).become=Trueallows Ansible to run tasks with sudo privileges by default. This means you don't have to explicitly specifybecome: yesin your playbooks for tasks that require elevated privileges.
Ansible will use settings specified in configuration file when running playbooks or ad-hoc commands from the master node (we will dive deeper into playbooks and ad-hoc commands in coming articles). It will connect to the managed nodes using the specified private key and disable host key checking for simplicity. Additionally, Ansible will automatically run tasks with sudo privileges, without requiring you to specify it in your playbooks.
You can now test the SSH key-based authentication by trying to log in to one of the managed nodes from the master node:
ssh vagrant@192.168.56.5If everything is set up correctly, ansible can now connect to the managed nodes without requiring passwords. This makes it much more convenient and secure to run playbooks and ad-hoc commands from the master node.
Create an Ansible Inventory File
An Ansible inventory file is a simple INI-formatted text file that defines the hosts and host groups that Ansible will manage. It's essentially a list of machines and their properties, organized into groups based on their roles or characteristics. Inventory files make it easier to manage and run playbooks against specific sets of servers.
Like the ansible config, the inventory file can be placed in any directory, but Ansible looks for it in the following locations by default:
/etc/ansible/hosts~/ansible/hosts
While the Ansible inventory file can be placed in any directory and named as desired, it's important to note that if you don't use the default name (hosts) or location (/etc/ansible/hosts), you'll need to specify the file using the -i flag when running Ansible commands. Most commonly, the inventory file is simply named inventory.
Similar to the Ansible configuration file, it's considered a best practice to keep your inventory file separate from the Ansible installation.
With this context in mind, let's create our inventory file.
On the master node, Inside the directory we create earlier (~/ansible-lab). Create a new file called hosts :
$ nano hostsIn this file, we'll define our host groups. Add the following lines:
192.168.56.4
192.168.56.5
192.168.56.6
Now, you have an Ansible inventory file named hosts that defines your host groups and their respective servers. You can reference this inventory file when running Ansible commands using the -i flag, like this:
$ ansible all -i hosts -m pingThis command will ping all hosts in the hosts inventory file, using the default user account specified during the Vagrant setup (which is 'vagrant' in our case).
However, to avoid specifying the inventory file every time you run Ansible commands, you can modify the ansible.cfg file and add the following line under the [defaults] section:
inventory = hostsWith this line added, your ansible.cfg file will look like this:
[defaults]
inventory = hosts
host_key_checking = False
private_key_file = ~/.ssh/id_rsa

[privilege_escalation]
become=True
By setting inventory = hosts, you're telling Ansible to use the hosts file as the default inventory. This way, you won't have to specify the -i flag every time you run Ansible commands.
To test the configuration, run:
To test the configuration run:
$ ansible all -m pingIt's important to note that Ansible assumes the user account on the managed nodes is the same as the user account on the master node. However, if the usernames differ between the master and managed nodes, you need to explicitly specify the username using the -u option:
$ ansible all -m ping -u jamesSumming up
With the inventory file and Ansible configuration set up, you are now ready to start writing Ansible playbooks and executing them against your host groups. In the next article, we'll explore Ansible ad-hoc commands, which enable you to perform quick tasks across your inventoried hosts without the need to write a full playbook.
Stay tuned for the next article!